I can't quite believe it now but I'd never eaten lentils outside of an Indian restaurant until about seven years ago. If you came from 'up North' lentils were suspiciously and unfairly derided as sandal and sock-wearing fodder; reserved only for chanting prats - their words, not mine. It's a cliche but my life pretty much turned upside down when I moved to London and thank GOD it did.
I made my lentilly fateful trip to The Epicerie (attached to Conran and Orrery) on Marylebone High St one lunchtime, it was nearing the end of the day and pretty much the only thing left to take out was puy lentils with smoked sausage and beetroot.
http://www.orreryrestaurant.co.uk/restaurants/orrery/epicerie

Clinging to the counter with hunger I went for it and never looked back. I'm a big Nigella Lawson fan and I return to one of her lentil recipes (in part) again and again which is the one I'm sharing here. The other half of the dish is inspired by my lovely friend Rosanna. We had the funniest time on her gypsy themed hen on a barge on the Oxfordshire waterways. 10 girls, copious prosecco and a whole load of dressing up = ACE! The highlight for me however was Rosanna's gorgeous lentil dish...I ended up finishing off everyone else's plate...no change there then!
Ingredients: Serves 4:
3–4 tablespoons olive oil
1 onion, finely chopped
Sea Salt
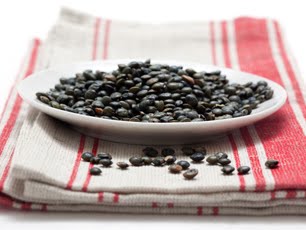
500g Puy lentils
1 fat clove garlic - skin removed
8 really good quality sausages - anything with tomato works well and preferably Italian
100ml red wine
50ml water
Very fresh flat-leaf parsley for sprinkling - curly parsley will not do
Few tbsp of ricotta cheese
Very good raspberry or sherry vinegar
Plain/non pickled whole beetroot, quartered
Method:
To cook the lentils, put 2–3 tablespoons of the oil into a good-sized saucepan (and one which has a lid that fits) on the heat and when it’s warm add the chopped onion. Sprinkle with salt (which helps prevents it browning) and cook over a low to medium heat till soft (about 5 minutes). Add the lentils, stir well and then cover generously with cold water. Bring to the boil, then cover and let simmer gently for half an hour or so until cooked and most, if not all, the liquid’s absorbed. I don’t add salt at this stage since the sauce provided by the sausages later (and which will be poured over the lentils) will be pretty salty itself. So, wait and taste. You can cook these in advance.
When either the lentils are nearly ready or you’re about to reheat them, put a heavy-based frying pan on the hob, cover with a film of oil and add the bruised garlic. Cook for a few minutes then add and brown the sausages. When the sausages are brown on both sides – which won’t take more than 5 minutes or so – throw in the wine and water and let bubble up. Cover the pan, either with a lid or tin foil, and cook for about 15 minutes. Using a fork, mash the now soft garlic into the sauce and taste for seasoning, adding a little more water if it’s too strong. Courtesy of NL.
Drain the lentils well and transfer to a roomy serving bowl. Add the beetroot and a whole bunch of roughly chopped parsley and very gently amalgamate. Sit the sausages on top and pour over your gravy. Drizzle with a little olive old and sprinkle over your preferred vinegar. For the finale, add a few good blobs of ricotta on top.

Don't be tempted to use pre-cooked, tinned lentils. Fine if you have to use them, I just think they're always a bit too soft, boggy and waterlogged. I've swapped Rosie's sherry vinegar for raspberry, just because I tried it and it worked a dream.
Colemans works excellently well on the side.


